The Concrete Forming Process on a Custom Home Build, Step by Step
August 17, 2026 | Category: Forming Resources
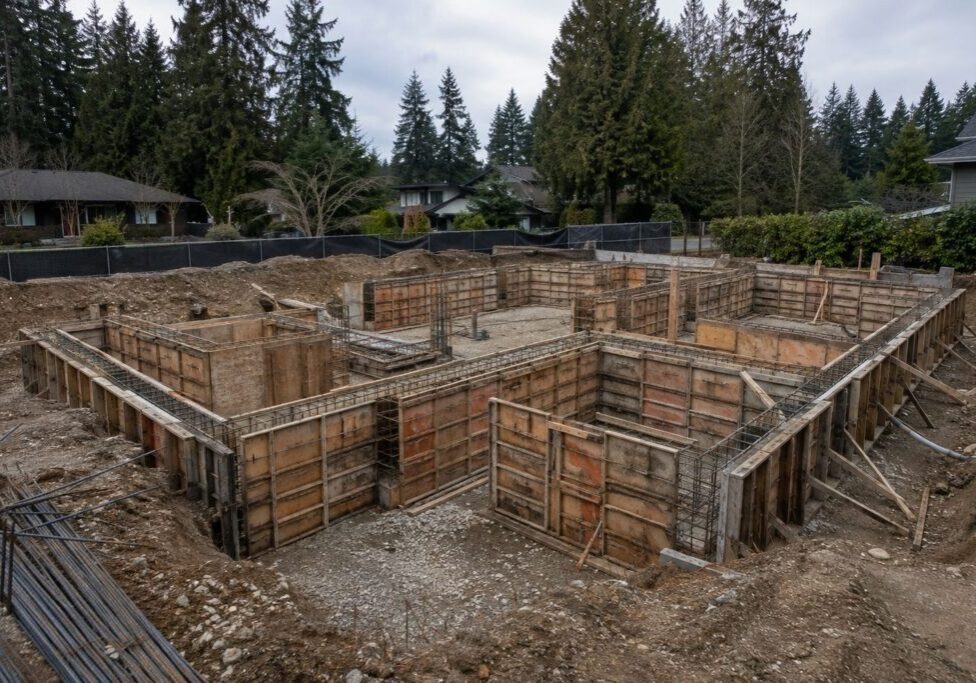
Concrete forming is the phase where your foundation is built as a temporary mould, filled with concrete, cured, and then stripped, and it runs in a set order from layout on the dug lot through to the hand-off to framing. It is the half of the build the finished house hides, and it decides whether everything above it sits straight, level, and square. By the end of this walkthrough you will be able to name every stage of the concrete forming process on a custom home, in order, and recognize what good work looks like on your own lot. The work is exacting, and it rewards a crew that treats each step as the setup for the next, which is how we run a disciplined pour and how good custom home concrete forming is done across the Lower Mainland.
At a glance:
- Layout and excavation set the exact position of the foundation on your lot.
- Footings spread the weight of the house onto undisturbed soil.
- Wall forms hold two faces apart to the precise thickness and line of the wall.
- Everything cast into the concrete, from anchor bolts to sleeves, goes in before the pour.
- The municipal pre-pour inspection is the point of no return, because concrete hides everything under it.
- Strength is built by curing, and the forms come off on strength gained, not on the calendar.
What Concrete Forming Actually Is
Forming is the trade of building the temporary moulds that hold wet concrete to the exact line, level, and thickness of a foundation’s footings and walls, then placing, consolidating, curing, and stripping that concrete so the finished foundation comes out true and strong. The mould is temporary and the concrete is permanent, so the craft is about controlling shape and position while the material is still liquid, then protecting it while it hardens. On a house, one crew carries that from the first survey line to pulling the last form off the cured wall, which is what keeps small errors from compounding across the phase.
Before the Pour: Getting the Foundation Ready to Fill
Most of the forming phase happens before any concrete arrives, and none of it shows in the finished house. What happens in these steps is what decides whether the foundation ends up straight, sound, and sitting where the drawings say it should.
Layout and Survey: Putting the House on the Lot
Layout is where the building’s corners and wall lines move off the drawings onto the excavated pad. The crew works from batter boards set back beyond the dig and pulls offset lines across them, so the strings that define the foundation hold their place while the forms come and go beneath them. Every dimension, every setback, and every diagonal that proves the building is square gets checked against the plan. An error here does not stay here: it is inherited by the footings, the walls, and every trade after, and it gets more expensive to fix at each step. So layout is measured and checked, never eyeballed.
Coordinating With the Excavator
The forming crew works to the dig, which has to reach the right bearing depth, leave over-dig for working room outside the forms, and finish with a clean, undisturbed bearing surface. This is where a real code requirement drives the job: footings have to sit on undisturbed soil, rock, or compacted granular fill, because soft or disturbed ground under a footing is a classic hidden defect that surfaces years later as a crack or a settle. That single rule from the BC Building Code is why the bearing surface the excavator leaves, and the inspector’s later look at it, matter so much.
Building the Footing Forms
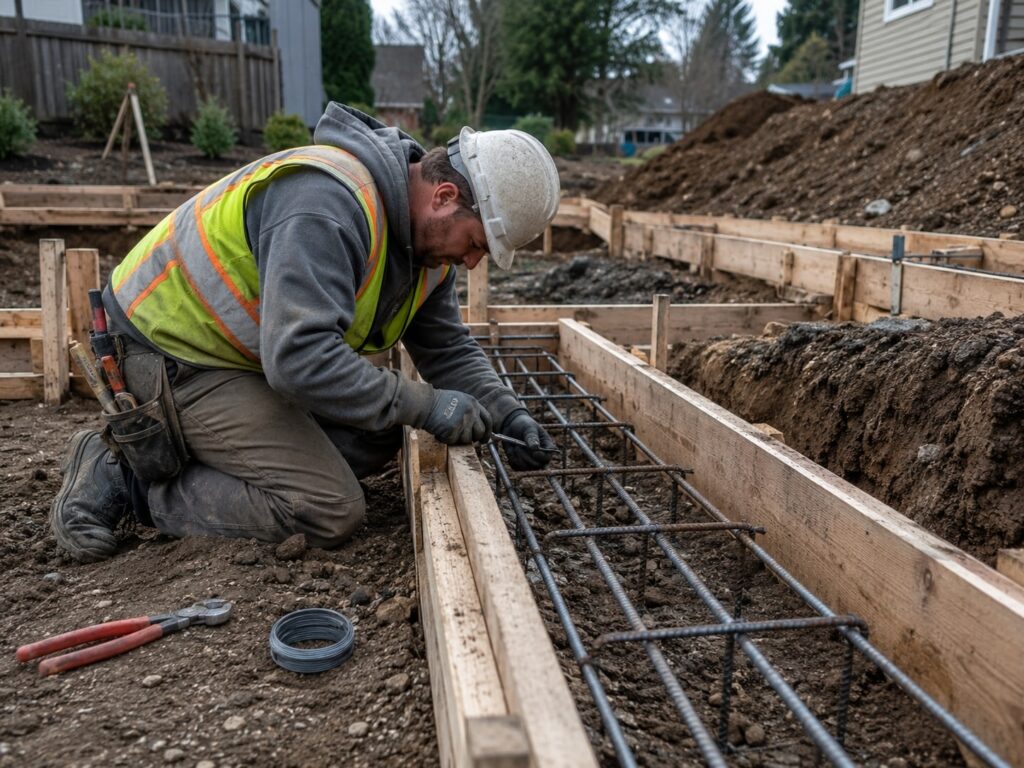
Once the bearing is right, the footing forms go in: low forms of staked lumber or proprietary footing forms that shape the strip footings under the walls and the pad footings under posts and columns. Their job is to spread the concentrated weight of the house across enough soil that the ground carries it without settling. As they come together, the crew sets a keyway or dowels along the top so the wall poured later locks into the footing rather than just sitting on it. That ties the two pours into one structure, and a footing is only as good as the soil under it and the wall above it.
Setting the Footing Reinforcing
Reinforcing steel goes in next, sized and spaced to the structural drawings, held on chairs at the correct depth, and tied so nothing shifts during the pour. Rebar sits a set distance in from the surface so the concrete keeps it protected, and that distance grows where the concrete is cast straight against the ground. The exact sizes, spacing, and cover come from your engineer’s drawings, and detailing reinforcing is a deep enough subject to warrant its own walkthrough. Here the point is simple: the steel is placed to the plan, at the right cover, and tied off before anything is poured on it.
Forming the Foundation Walls
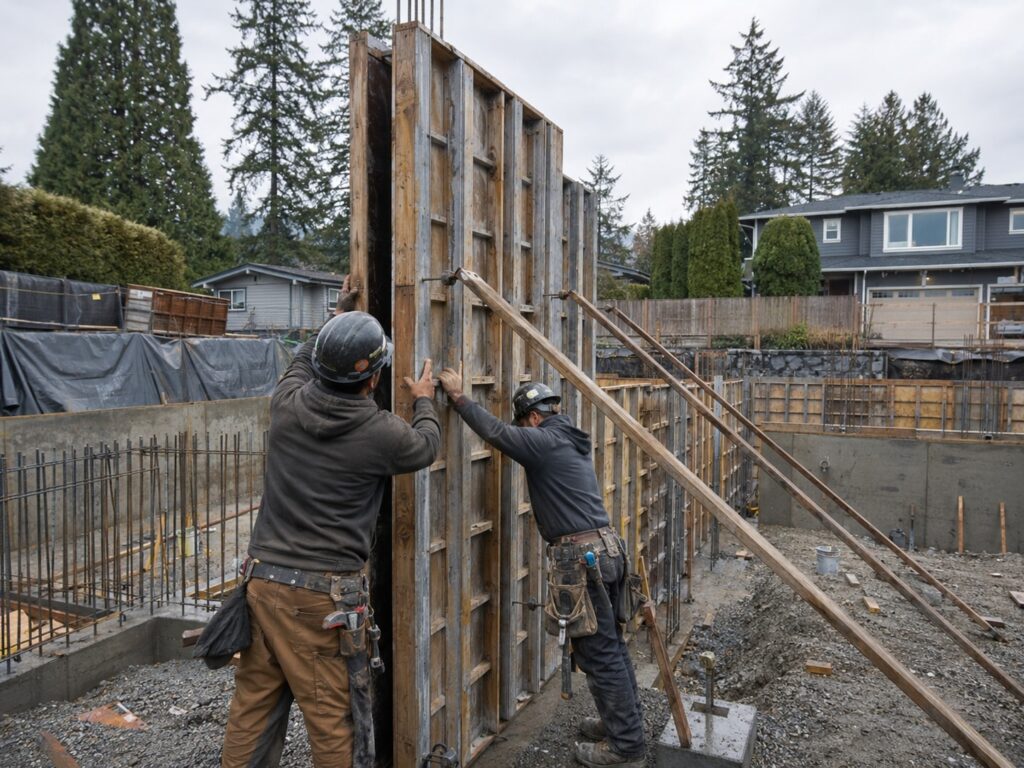
With the footing poured and set, the walls go up: two form faces held apart to an exact thickness and braced dead plumb and straight, so they hold that line against the push of wet concrete.
Standing the Wall Forms
The two faces are held apart by form ties and spreaders at the specified thickness, then braced and aligned so the wall comes out plumb, straight, and true. The systems used range from job-built plywood and lumber, to modular aluminum or steel panels, to insulated concrete forms that stay in place and become part of the wall. Each has its place, and which one suits a house is a decision on its own. Whatever the system, the forms are set to real numbers. One is a code minimum: a foundation wall has to stand at least 150 mm above the finished ground around it, so water sheds away from the wood framing above rather than pooling against it.
What Gets Cast Into the Wall: Reinforcing, Embeds, and Bolts
Before the wall is closed up, the vertical and horizontal reinforcing goes in, then everything that has to live inside the concrete: anchor bolts and hold-downs for the sill plate, beam pockets, sleeves for plumbing and services, window bucks, and brick ledges. Forget one now and it becomes a core-drilled hole or an epoxy anchor into cured concrete later, always weaker and slower than casting it in. The bolts that tie the wood sill plate to the concrete are set into the wet pour by the forming crew, not the framer who arrives weeks later. They run at least 12.7 mm across, sink at least 100 mm in, and sit no more than 2.4 m apart, with at least two per braced wall section and one near each end. Placing them right shows the crew is already thinking about the framing to come.
The Pre-Pour Inspection: The Point of No Return
Concrete hides everything under it, so before any of it goes in, the work gets inspected. This is the gate the whole schedule turns on, and nothing pours until it clears.
What the Municipal Inspector Checks
After the excavation is finished and the reinforcing and forms are in place, the municipal building inspector checks the forms, the steel, and the setbacks before any concrete is allowed on site. In the Lower Mainland your city inspects the footings and forms at this stage, and the pour cannot proceed until that inspection passes. What the inspector calls the stage and how many stops they make varies from one municipality to the next, so this is “your city inspects before you pour,” not one fixed national checklist. A home inside the City of Vancouver is built to the Vancouver Building By-law, the city’s own code, while the other cities across the service area apply the BC Building Code. Either way, this is the last chance to catch a buried mistake before the concrete makes it permanent.
Engineered Formwork and the Engineer’s Sign-Off
On most house foundations the municipal inspection is the sign-off that matters, and a routine basement wall does not need an engineer standing at the pour. The extra layer applies to formwork that is tall or that the building’s designer has specifically designated as engineered. For that kind of formwork, a professional engineer certifies the formwork design and then inspects and certifies the forms right before concrete is placed, putting a second set of expert eyes on the temporary structure that has to hold back tonnes of wet concrete. It is a real safeguard for the pours that warrant it, but it is the exception on a standard custom home rather than the rule.
The Pour and Consolidation
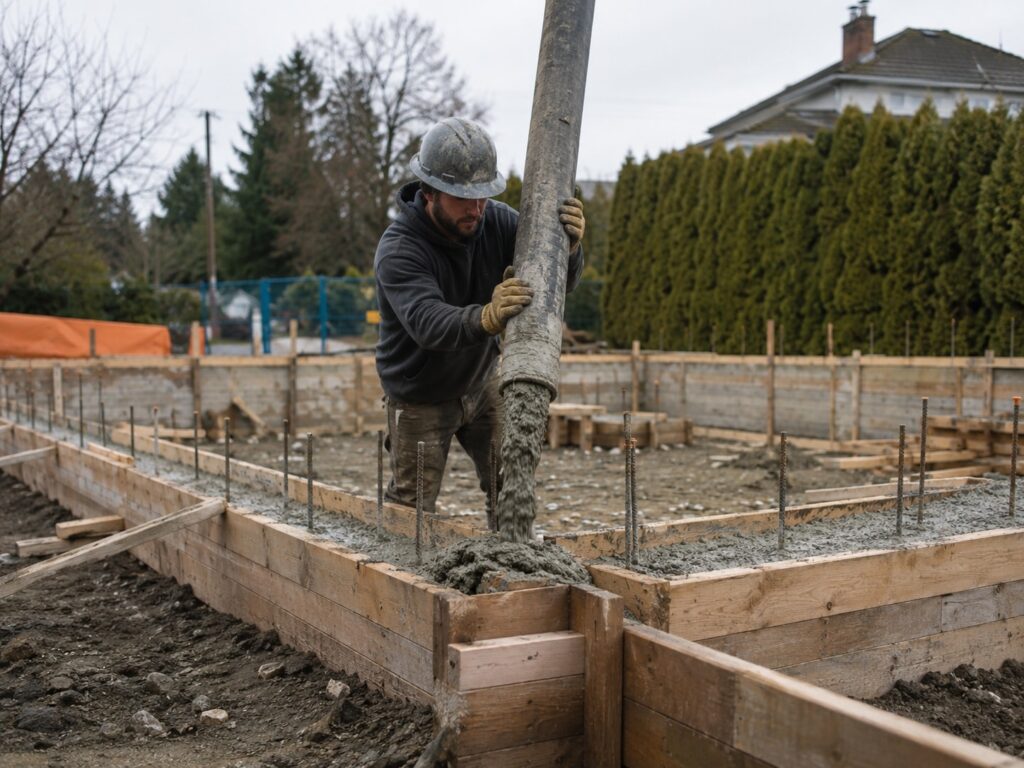
This is the day most people picture when they think about the foundation, but the outcome was already decided by everything above it. The pour just makes the setup permanent.
Placing the Concrete
Ready-mix concrete arrives by truck and is placed into the forms by chute, pump, or crane-and-bucket, always in lifts and kept moving rather than dumped in one spot. The mix is not arbitrary: house foundation concrete has to meet the national concrete standard the code points to, CSA A23.1, which governs how it is proportioned, placed, and cured for its exposure. Its strength is set by your project’s engineer for the conditions on your site, and it typically lands in the range of 25 to 32 megapascals, higher where the concrete will face freezing, thawing, and road salts. Your structural drawings give the exact number. The crew keeps the concrete moving and the lifts coming steadily to avoid a cold joint, a weak seam that forms when one batch stiffens before the next arrives, and a continuous pour keeps the wall monolithic from footing to top.
Consolidation: Getting the Air Out
As the concrete goes in, it gets consolidated with an internal poker vibrator worked down through each lift. The vibration settles the concrete tight around the reinforcing and against the form face, driving out the trapped air that would otherwise leave voids and honeycombing in the finished wall. This is a craft judgment, not a switch you leave on. Under-vibrating leaves the wall porous and weak in spots you cannot see, and over-vibrating drives the heavier aggregate down and lets water and fines rise, which weakens the top of the pour. A crew that reads the concrete and works each lift the right amount is doing something you never see in the finished wall, and it is what separates a sound foundation from an acceptable one.
Finishing and Setting the Anchor Bolts
As the pour tops out, the crew strikes the top of the wall to grade so it finishes flat and level for the framing that lands on it, and floats any slab surfaces where they apply. This is also the moment the anchor bolts are pushed into position in the wet concrete and held there while it starts to set, so they end up plumb, at the right height, and exactly where the sill plate needs them. Timing matters: too early and the bolts drift, too late and the concrete has stiffened past setting them clean. This stage is about getting each bolt seated true before the concrete takes its shape for good.
After the Pour: Curing, Stripping, and the Hand-Off
The concrete is placed, but it is nowhere near finished. The next several days decide how strong the foundation actually becomes.
Curing: Where Strength Is Actually Made
Curing is keeping the concrete warm and moist while it gains strength, and it is the most under-respected step in the phase. Concrete keeps gaining strength for weeks, and the 28-day mark is the standard age engineers test it against, but it reaches a large share of that strength in the first week. That is exactly why the early days carry so much weight: protect the concrete well now and it hits its numbers, neglect it and the wall never quite gets there. Lower Mainland winters are cool and wet, so once temperatures drop toward freezing a pour needs added heat and protection while it cures, which is a subject of its own. In every season the constant is the same: strength is built by care in the early days, not by the calendar.
Stripping the Forms
The forms come off once the concrete has gained enough strength to hold its own shape and take handling loads, which is a strength question rather than a fixed number of days on a schedule. Cool, wet weather slows the strength gain and stretches the wait, which is one reason a good crew reads conditions instead of counting days. Because homeowners understandably want to know when this happens and how it fits the build schedule, the day-by-day picture is covered in a walkthrough of how long the forming phase takes, and that is the place to look for timing. Here the rule is simple: the forms stay on until the wall is ready to stand without them, and not an hour before it is safe to pull them.
Damp-Proofing, Drainage, and the Hand-Off to Framing
With the forms off, the stripped wall gets prepped for the work that keeps water out of the finished home. The exterior is damp-proofed or waterproofed, perimeter drainage is set at the footing to carry groundwater away, and only then is the foundation backfilled. How that waterproofing is built up is a subject in its own right, but for the forming phase the point is that the wall is left clean, sound, and ready for it. Once the foundation is backfilled, the build moves into the framing stage that follows, where the wood structure rises off the sill plates the forming crew bolted down. Because we run forming and framing with one crew, that hand-off is internal rather than a gap between contractors, so the wall arrives at framing exactly as it needs to be.
Where Forming Goes Wrong, and How a Good Crew Prevents It
Almost every forming failure traces back to one of a handful of shortcuts, and each has a discipline that prevents it. Pouring on disturbed or unapproved bearing is prevented by working to the dig and letting the inspector confirm the soil before any concrete lands on it. Forms that bulge or blow out come from under-bracing, so they get braced and tied to hold their line against the real pressure of wet concrete. A forgotten embed is prevented by walking the forms against the drawings before the pour, because a sleeve added now is far cheaper than a core-drilled hole later. A cold joint comes from a slow or interrupted pour, so the crew keeps the concrete moving. Stripping or backfilling too early is prevented by judging strength instead of the calendar. And skipping curing, then blaming the mix, is prevented by treating the first days as part of the pour. This is the ordinary discipline that separates a crew that owns the outcome from one that just runs the sequence.
Stage-by-Stage Map of the Forming Process
Here is the whole forming phase in one view, from the first survey line to the stripped wall, with the point where each stage gets checked or signed off.
| Stage | What happens | Who checks or signs off |
| Layout and survey | Building lines transferred from the drawings onto the pad | Crew self-check against the plan |
| Excavation and footings | Footings formed on undisturbed bearing | Crew, then municipal inspector at the pre-pour |
| Wall forms and embeds | Walls set to thickness and line, bolts and sleeves cast in | Crew, plus an engineer on engineered formwork |
| Pre-pour inspection | Forms, steel, and setbacks verified before any pour | Municipal building inspector |
| Pour and consolidation | Concrete placed in lifts and vibrated tight | Crew, with the supplier’s mix ticket |
| Curing | Wall kept warm and moist while it gains strength | Crew |
| Stripping and hand-off | Forms removed on strength, wall prepped for waterproofing and framing | Crew |
Building a Custom Home Foundation in the Lower Mainland
Forming is one disciplined sequence, and it runs smoothly when one experienced crew owns it from the survey line to the stripped, waterproofed wall. That is how we work at Anvil West: forming and framing delivered by a single crew led by Red Seal carpenters, so the foundation is built by the same people who will frame on it and nothing is lost between contractors. The company has been owner-led since 2013, with stable crews who have poured many Lower Mainland foundations, keeping the small details right across a whole phase. If you are planning a build and want it handled by a foundation forming contractor who works this way, read more about how our residential concrete forming is done and then reach out to book a consultation about your project.
Frequently Asked Questions
A few questions come up on almost every custom home foundation, so here are the short answers.
What Are the Main Steps of the Concrete Forming Process?
The process runs in order: layout on the lot, excavation, footing forms and reinforcing, the footing pour, the wall forms with all their embeds and anchor bolts, the municipal pre-pour inspection, the wall pour and consolidation, curing, stripping the forms, and the hand-off to waterproofing and framing. Each step sets up the one after it, which is why an experienced crew treats the early stages as seriously as the pour itself.
Who Sets the Anchor Bolts, the Forming Crew or the Framer?
The forming crew sets them, into the wet concrete during the wall pour, before it hardens. The framer arrives later to build on those bolts, so if they are missing or out of position it becomes a problem the framer inherits rather than one they can fix, which is why placing them accurately is a forming job from the start.
What Strength of Concrete Is Used for a House Foundation?
Foundation concrete strength is set by your project’s engineer for the conditions on your site, and it typically falls in the range of 25 to 32 megapascals, with the higher end where the concrete faces freezing, thawing, and road salts. Your structural drawings give the exact number, and the mix on the truck is ordered to match it.
Do the Footings and Forms Really Have to Be Inspected Before Pouring?
Yes. Your city inspects the footings and forms before you are allowed to pour, and the pour cannot proceed until that inspection passes, because concrete covers the work and this is the last chance to catch a buried mistake. Homes inside the City of Vancouver are inspected under the Vancouver Building By-law, while the rest of the Lower Mainland follows the provincial code.
When Can the Forms Be Stripped?
The forms come off once the concrete has gained enough strength to hold its own shape and take handling, not after a set number of days. Cool, wet weather slows that strength gain and stretches the wait, and the day-by-day timing is covered in the walkthrough of how long the forming phase takes.
What Happens to the Foundation if It Rains or Gets Cold During the Pour?
Pours are managed around the weather rather than left to it. Rain is planned for and shed off a fresh pour, and once temperatures drop toward freezing a pour needs added heat and protection while it cures so the concrete keeps reacting and gaining strength. Handling a cold-weather pour in detail is a subject of its own.
Can One Crew Handle Both the Forming and the Framing?
Yes, and it removes the hand-off gap where problems usually hide. When the same crew forms the foundation and then frames on it, the people setting the anchor bolts and levelling the top of the wall are the same people who have to build on them, so the wall arrives at framing exactly as the framing needs it rather than as a surprise from another trade.